Manage all components of Litmus in one place
Backstage is an open platform for building developer portals and is one of the most popular CNCF projects. It allows developers to manage cloud-native applications' numerous services and codes from a single point. Chaos engineering can verify an application's resilience. It gives you the opportunity to identify various vulnerabilities in your application. Therefore, having information about Litmus chaos experiments alongside other application elements, such as application code, and CI/CD pipeline information, is highly beneficial to developers.
Features
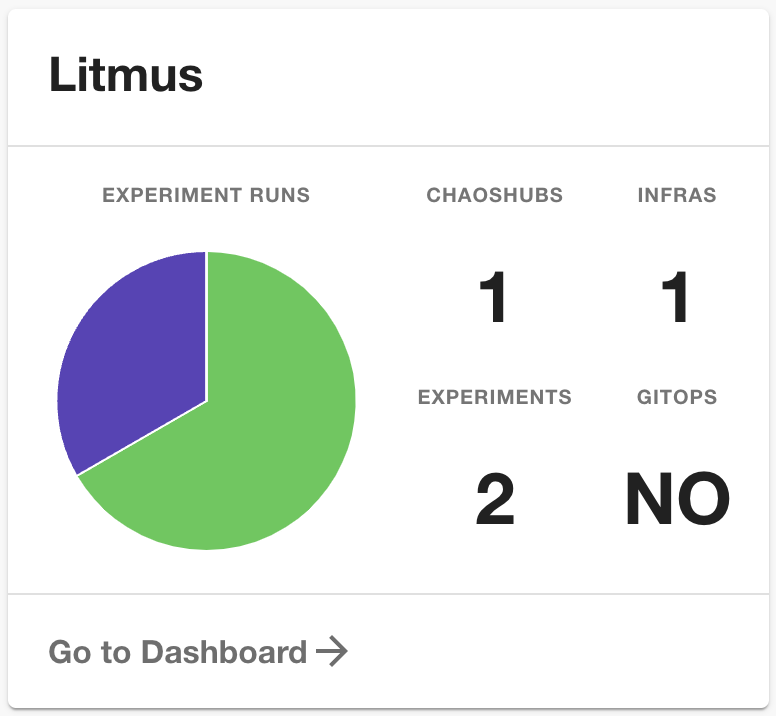
EntityLitmusCard
- See the number and status of your experiments in a graph.
- See representative information about Litmus (number of Chaos Hubs, GitOps status, etc.).
- Provide a direct link to Litmus.
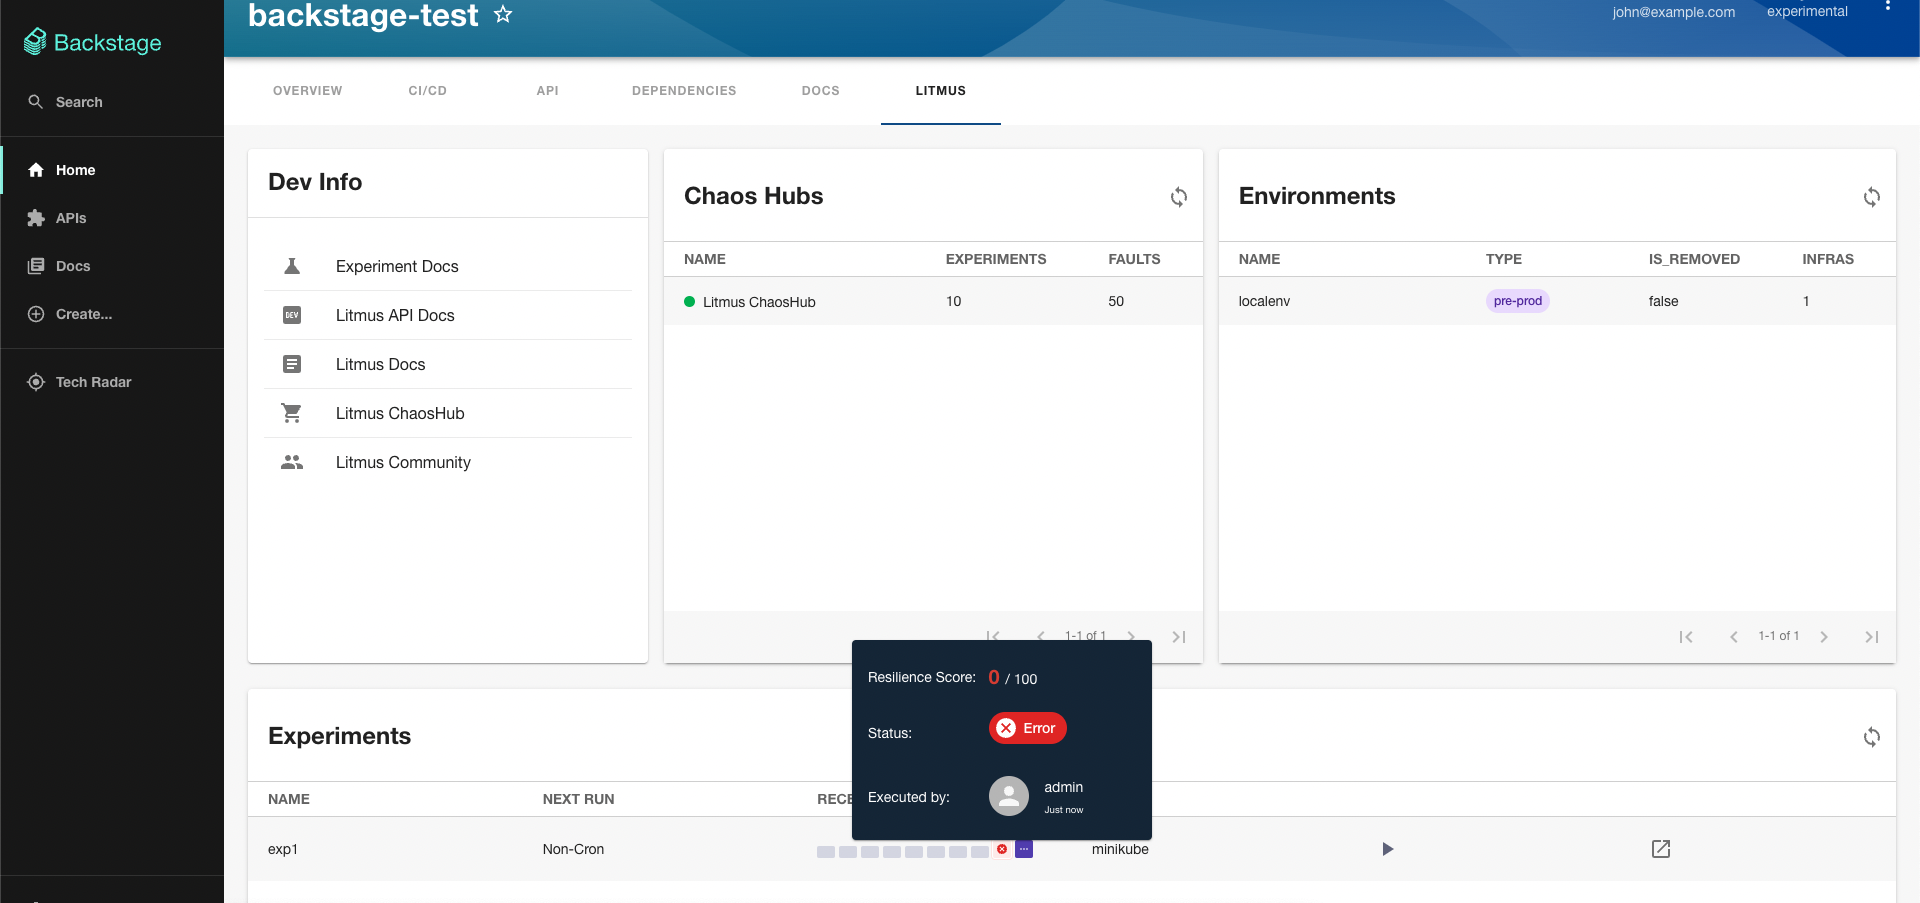
EntityLitmusContent
- The
Dev Infosection provides a number of useful links related to Litmus. - The
Chaos Hubssection provides information about the Chaos Hubs registered with Litmus.- Clicking on each item will redirect you to that item's detailed page.
- The
Environmentssection provides information about the environments and infrastructures registered with Litmus.- Clicking on each item will redirect you to that item's detailed page.
- The
Experimentssection offers details on the Chaos Experiments that were created within the platform.- If you hover over 'RECENT EXPERIMENT RUNS', you can view detailed information about the experiments including resiliency score and status.
- We can directly launch chaos experiments by clicking the play button.
Before you begin
- Compatible only with Litmus version 3.0.0 or later.
Getting started
In the
./packages/appproject add the plugin.yarn add backstage-plugin-litmusGet Litmus API Token through the Litmus UI
- Click "SETTINGS" in the sidebar.
- Click "+ New Token" Button in the 'API Tokens' section.
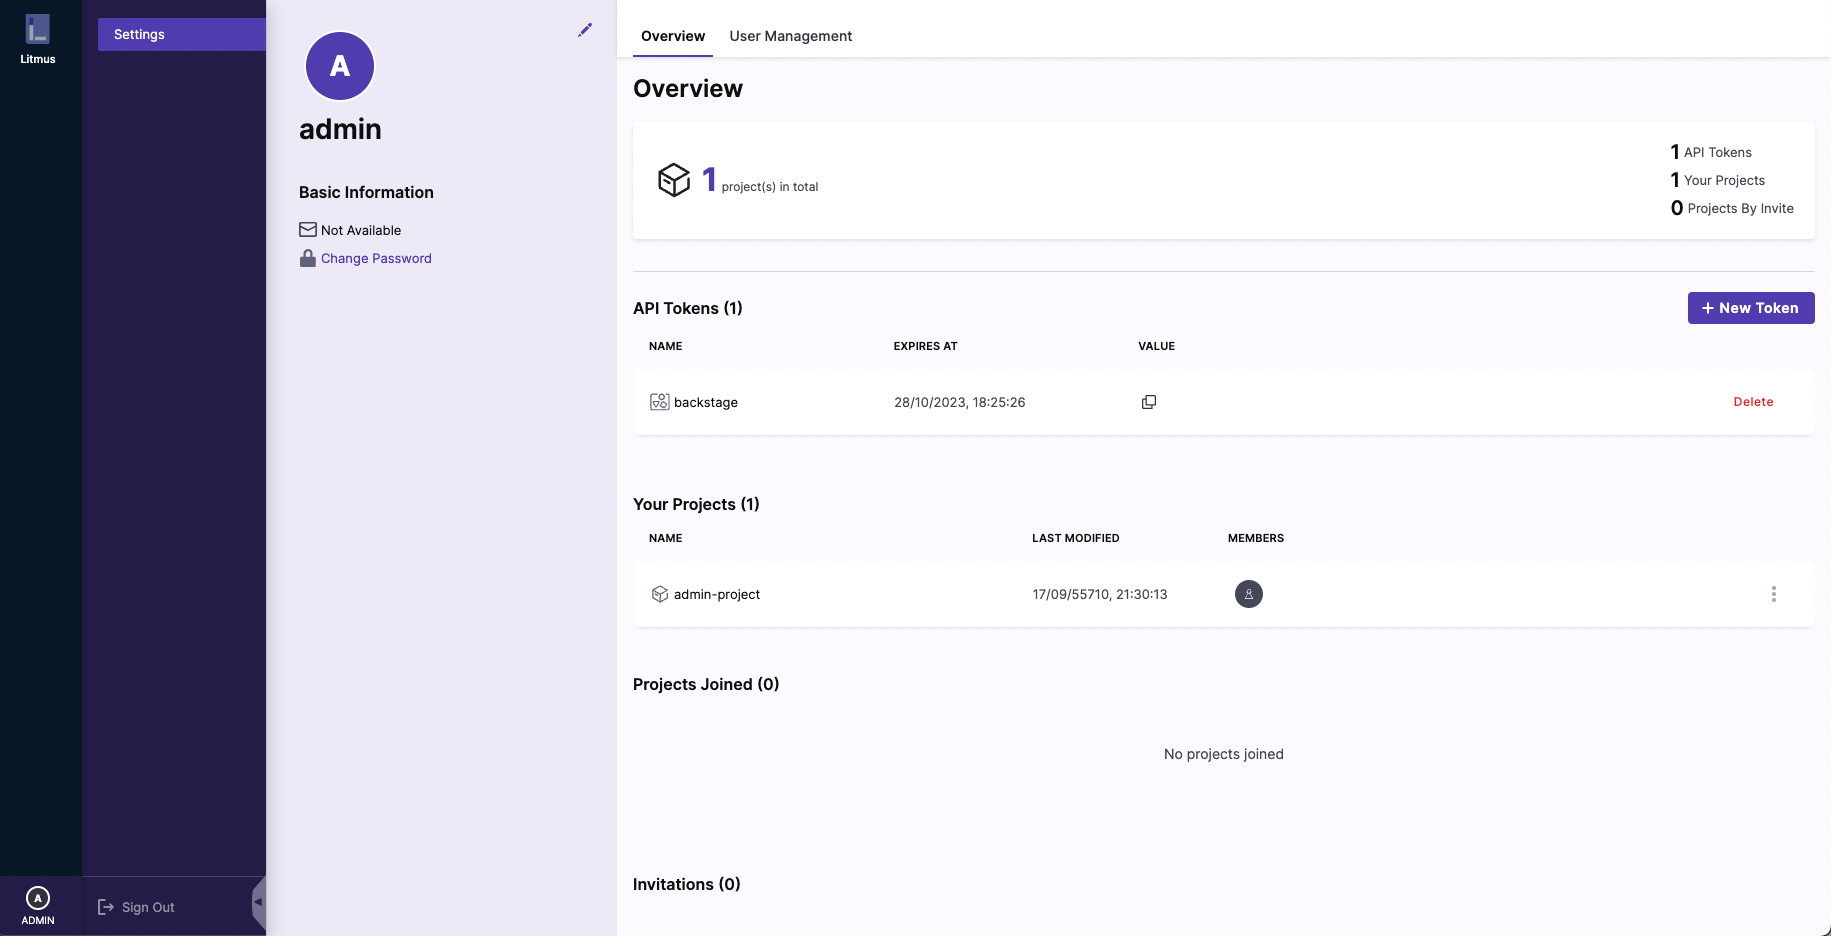
- Enter your information and click "Confirm".
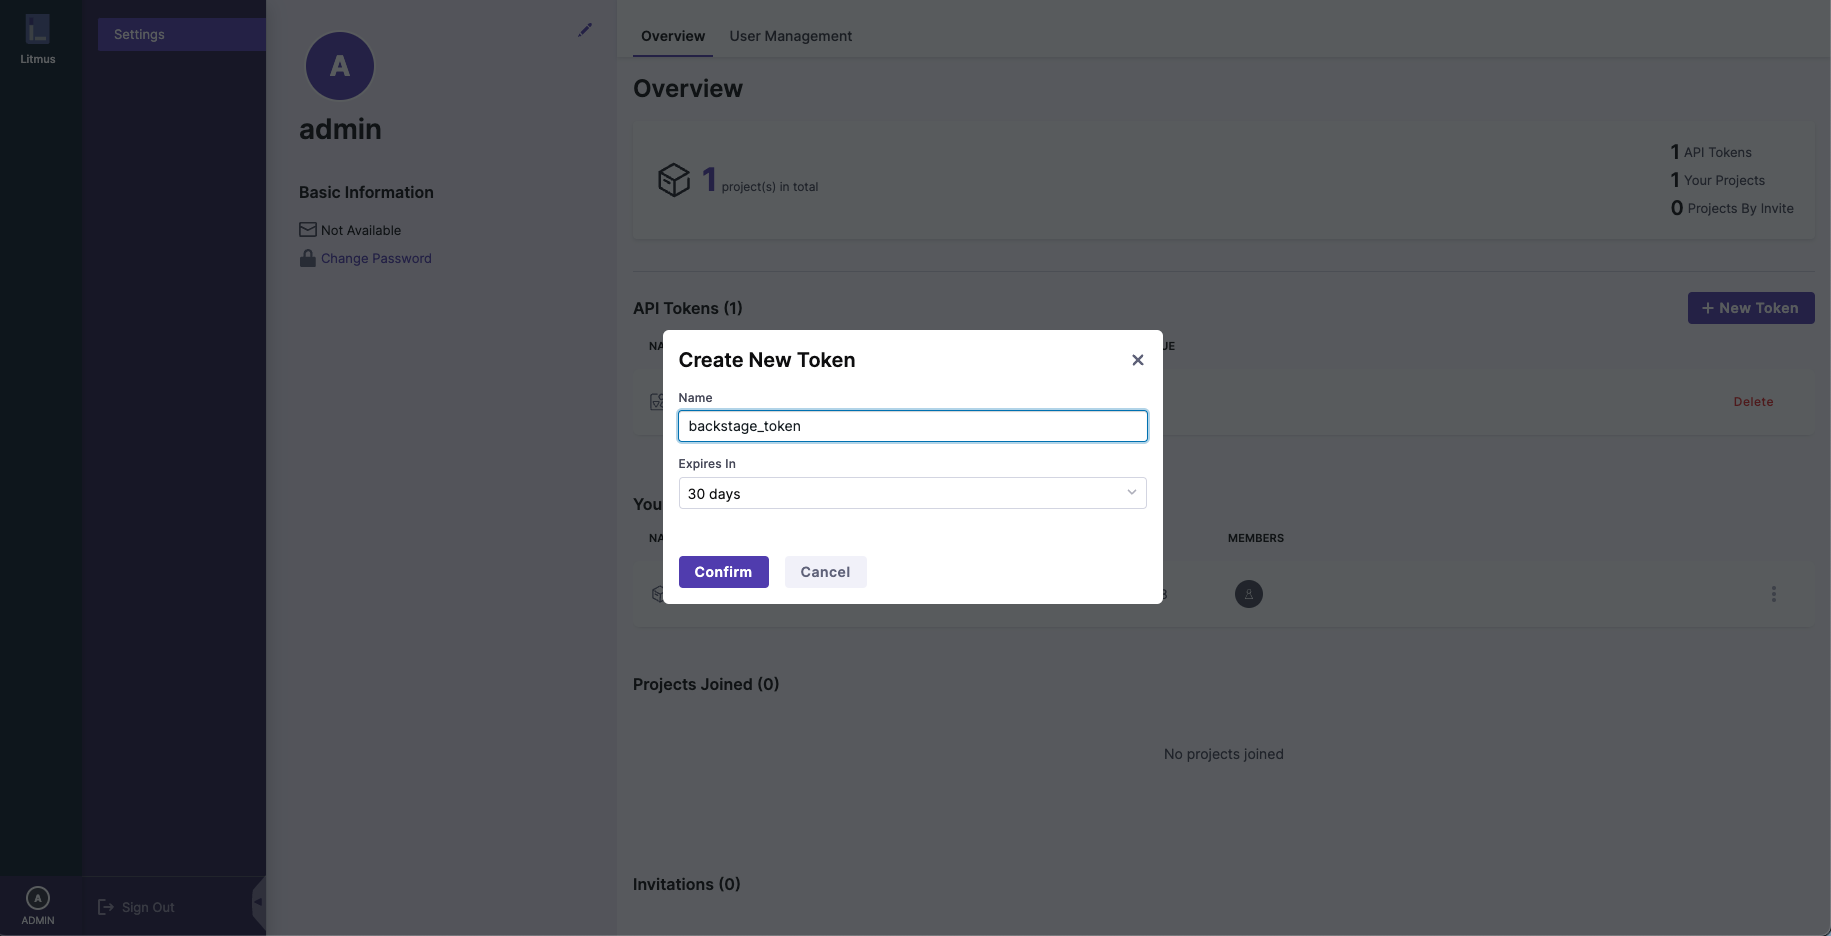
- Get the token in the "VALUE" column.
In the
app-config.yamlfile root directory, add litmus proxy and info like belowproxy:
'/litmus':
target: 'your-own-litmus-ui-url'
changeOrigin: true
headers:
Authorization: 'Bearer ${LITMUS_AUTH_TOKEN}'
litmus:
baseUrl: 'your-own-litmus-ui-url'
apiToken: ${LITMUS_AUTH_TOKEN}Add your auth key to the environmental variables
export LITMUS_AUTH_TOKEN="your-own-token"Adding annotations and values to your component file.
apiVersion: backstage.io/v1alpha1
kind: Component
metadata:
  name: component-name
  description: 'description'
  annotations:
litmuschaos.io/project-id: 'your-own-project-id'Enabling frontend
// packages/app/src/components/catalog/EntityPage.tsx
import { isLitmusAvailable, EntityLitmusCard, EntityLitmusContent } from 'backstage-plugin-litmus'
// ...
const overviewContent = (
  <Grid container spacing={6} alignItems="stretch">
    // ...
    <EntitySwitch>
      <EntitySwitch.Case if={isLitmusAvailable}>
        <Grid item md={4} xs={12}>
          <EntityLitmusCard />
        </Grid>
      </EntitySwitch.Case>
    </EntitySwitch>
    // ...
  </Grid>
)
// ...
const serviceEntityPage = (
  <EntityLayout>
    // ...
    <EntityLayout.Route path="/litmus" title="Litmus">
      <EntityLitmusContent />
    </EntityLayout.Route>
    // ...
  </EntityLayout>
)